

Are you tired of second-guessing your entry and exit points when analyzing daily charts? Do you find yourself overwhelmed by the noise and volatility, struggling to identify clear trading signals? Imagine having a reliable compass that helps you navigate the complexities of the market, highlighting potential opportunities with precision.
The question on many traders’ minds is: what are the best EMA settings for a 1 day chart? The truth is, there isn’t a single magic number. Instead, finding the optimal EMA settings for your 1-day chart hinges on understanding your individual trading style and objectives. This comprehensive guide will walk you through the nuances of selecting the best exponential moving average settings for daily charts, empowering you to make more informed and confident trading decisions. Whether you’re a seasoned swing trader or just beginning your journey with daily chart analysis, mastering the application of the best EMA settings for 1 day chart can significantly sharpen your edge, particularly when engaging with a forex broker.
Introduction to EMA and Its Importance in Trading

Navigating the financial markets requires a robust toolkit, and among the most valuable instruments is the Exponential Moving Average (EMA). This indicator helps traders smooth out price fluctuations, offering a clearer perspective on the underlying trend. Let’s delve into why the EMA is so crucial.
What is EMA (Exponential Moving Average)?
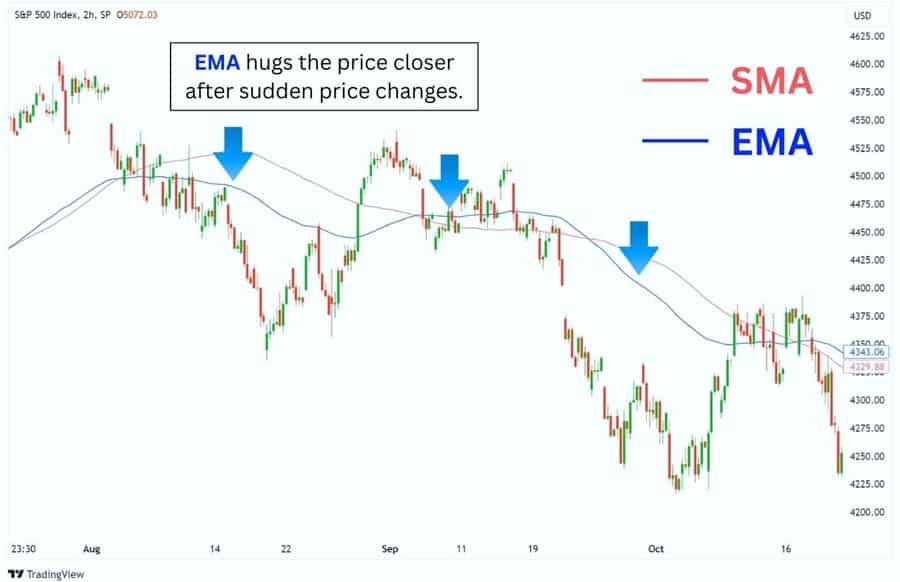
The Exponential Moving Average (EMA) is a type of moving average that places a greater emphasis on recent price data. Unlike the Simple Moving Average (SMA), which assigns equal weight to all prices within a specified period, the EMA reacts more swiftly to new price movements. This responsiveness makes it particularly useful for identifying potential shifts in momentum and direction, a critical advantage when analyzing a 1-day chart where each bar represents a full day’s trading activity.
Why EMA is popular among traders for short-term and intraday trading
While often associated with shorter timeframes, the EMA’s adaptability extends its utility to daily chart analysis. Its sensitivity to recent price action allows traders to detect emerging trends and potential reversals earlier than less responsive indicators. For traders working with a broker for forex trading, this early detection can be invaluable for capitalizing on timely opportunities. The EMA effectively filters out short-term noise, providing a more focused view of the intermediate-term trend on the daily chart.
Importance of EMA settings for 1-day charts
The “settings” of an EMA refer to the number of periods used in its calculation. On a 1-day chart, a “period” corresponds to one trading day. Selecting the appropriate EMA settings is paramount because it directly influences the indicator’s sensitivity. A shorter period EMA (e.g., a 9-day EMA) will react quickly to price changes, potentially generating more trading signals. Conversely, a longer period EMA (e.g., a 200-day EMA) will react more slowly, offering a smoother representation of the long-term trend. Determining the best EMA settings for your 1-day chart involves finding the optimal balance between responsiveness and reliability, aligning with your specific trading strategy and risk tolerance.
Read More: Long Term Forex Trading Strategy
Understanding EMA Settings
To effectively leverage the power of the EMA, a solid understanding of its settings and their impact on its behavior on a 1-day chart is essential. Different settings reveal different facets of price action.
Explanation of EMA periods (e.g., 9, 20, 50, 100, 200)
Different EMA periods offer distinct perspectives on price movements. Here’s a breakdown of commonly used settings:
- 9-day EMA: This is a short-term EMA, highly sensitive to recent price fluctuations. It’s often favored by short-term traders seeking to identify immediate momentum shifts. On a 1-day chart, it can highlight short-term trends within a larger context.
- 20-day EMA: A popular choice for identifying intermediate-term trends. It strikes a balance between responsiveness and smoothing, making it useful for swing traders analyzing daily charts. Many traders using an online forex broker find this setting effective for confirming trend direction.
- 50-day EMA: Widely regarded as a key indicator of the medium-term trend. It’s less susceptible to short-term volatility, providing a more stable view of the prevailing direction. Crossing above or below the 50-day EMA is often considered a significant signal.
- 100-day EMA: Offers a longer-term perspective, aiding in the identification of major trends and potential support and resistance levels. It’s less prone to whipsaws and provides broader context for trading decisions.
- 200-day EMA: Considered a critical indicator of the long-term trend. Many investors and long-term traders closely monitor the 200-day EMA to assess the overall health of an asset. A price crossing above the 200-day EMA is often seen as a bullish signal, while a cross below is considered bearish.
How EMA settings differ for various timeframes (e.g., 1-day vs. 1-hour charts)
The interpretation and effectiveness of EMA settings can vary significantly across different timeframes. Settings that prove effective on a 1-hour chart might not be optimal for a 1-day chart, and vice versa. Shorter timeframes, such as the 1-hour chart, require more responsive EMAs (shorter periods) to capture intraday price swings. Longer timeframes, like the 1-day chart, benefit from smoother EMAs (longer periods) that filter out daily noise and emphasize the broader trend. Therefore, understanding the specific characteristics of the timeframe you are analyzing is crucial for selecting the appropriate EMA settings.
The role of EMA in identifying trends and reversals
The EMA is a powerful tool for both identifying the direction of a prevailing trend and spotting potential trend reversals.
- Trend Identification: When the price consistently trades above a specific EMA, it suggests an uptrend. Conversely, when the price consistently trades below an EMA, it indicates a downtrend. The slope of the EMA also provides insights into the strength of the trend. A steeply rising EMA suggests strong bullish momentum, while a sharply declining EMA indicates strong bearish momentum.
- Reversal Signals: EMA crossovers, where two EMAs with different periods intersect, can signal potential trend reversals. For example, when a shorter-period EMA crosses above a longer-period EMA, it can be interpreted as a bullish signal, suggesting a potential shift from a downtrend to an uptrend. Conversely, a shorter-period EMA crossing below a longer-period EMA can be a bearish signal.
Best EMA Settings for 1-Day Charts
Let’s explore some commonly used and effective EMA settings specifically for analyzing daily charts. Remember, the goal is to find settings that align with your trading style and help you identify high-probability trading opportunities.
Commonly used EMA settings for daily charts (e.g., 9-21, 20-50, 50-200)
While there’s no universally perfect setting, certain EMA combinations have proven their effectiveness for many traders analyzing 1-day charts:
- 9 and 21-day EMA: This combination is popular among swing traders aiming to capture short to medium-term trends. The 9-day EMA reacts quickly to price changes, while the 21-day EMA provides a slightly smoother perspective. Crossovers between these two can signal potential entry and exit points for timely trades.
- 20 and 50-day EMA: A widely adopted combination for identifying intermediate-term trends. The 20-day EMA acts as a faster-moving average, while the 50-day EMA provides a more stable reference point. Crossovers are often considered significant indicators of trend changes, making this a valuable tool for many traders.
- 50 and 200-day EMA: This combination is favored by longer-term traders and investors. The 50-day EMA helps identify medium-term trends within the broader context of the 200-day EMA, which represents the long-term trend. The “golden cross” (50-day EMA crossing above the 200-day EMA) and the “death cross” (50-day EMA crossing below the 200-day EMA) are closely watched signals indicating significant shifts in market sentiment.
How to choose the right EMA settings based on trading style (Scalping, Swing Trading, etc.)
Your individual trading style should significantly influence your choice of EMA settings. Different styles have different needs when it comes to identifying and acting on market signals.
- Scalpers: While scalping primarily focuses on very short timeframes, understanding the daily chart’s EMA can provide valuable context regarding the overall trend direction. A scalper might use a very short-term EMA (e.g., 9-day) on the daily chart to gauge the prevailing short-term momentum before focusing on shorter timeframes for precise entries and exits.
- Day Traders: Day traders, who operate primarily on intraday charts, can still benefit from analyzing the daily chart using EMAs. Settings like the 20-day or 50-day EMA can help identify the overall trend direction for the day, influencing their intraday trading bias and helping them align their trades with the dominant market movement.
- Swing Traders: Swing traders, who hold positions for several days or weeks, often find the 9-21, 20-50, or even the 50-200 day EMA combinations highly effective for identifying entry and exit points based on medium-term trend changes. These settings help them capture significant price swings while filtering out short-term noise.
- Position Traders/Long-Term Investors: These traders primarily focus on long-term trends and often rely on the 100-day and 200-day EMAs to assess the overall market direction and identify potential long-term investment opportunities. These longer-term EMAs provide a broader perspective, minimizing the impact of short-term fluctuations.
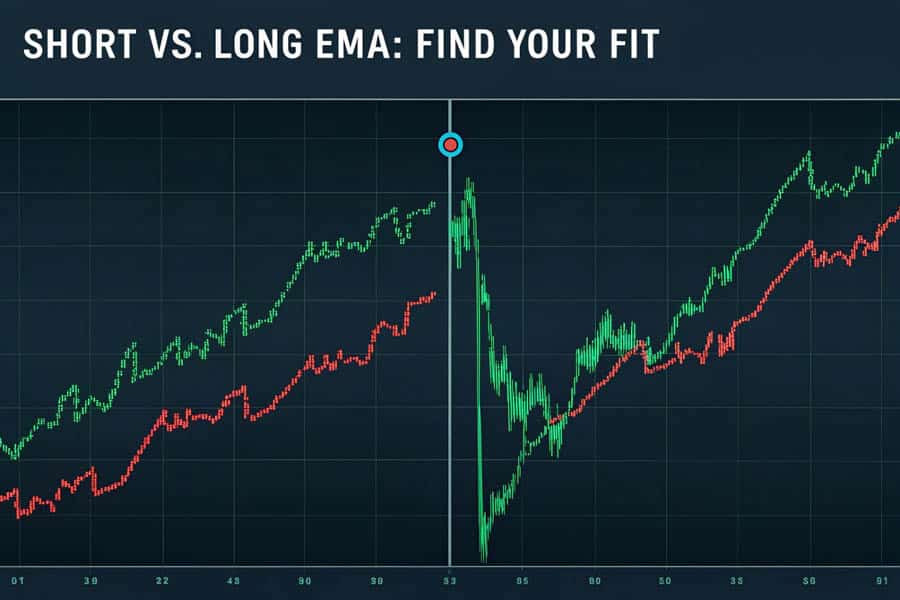
Pros and cons of shorter vs. longer EMA periods
Understanding the trade-offs between using shorter and longer EMA periods is crucial for making informed decisions that align with your trading strategy and risk tolerance.
- Shorter EMA Periods (e.g., 9, 20):
- Pros: More responsive to price changes, generating earlier signals which can be advantageous for capturing quick profits. Can help identify short-term momentum shifts effectively.
- Cons: More prone to whipsaws and false signals, especially during periods of high volatility, potentially leading to premature entries or exits. Can lead to overtrading if not used judiciously.
- Longer EMA Periods (e.g., 50, 100, 200):
- Pros: Smoother, providing a clearer view of the overall trend by filtering out short-term noise. Less susceptible to short-term fluctuations and false signals, offering a more stable perspective.
- Cons: Slower to react to price changes, potentially missing early entry points at the beginning of a new trend. May lag behind significant trend reversals, leading to delayed reactions.
Read More: Moving Average Indicator in Forex
How to Use EMA on a 1-Day Chart
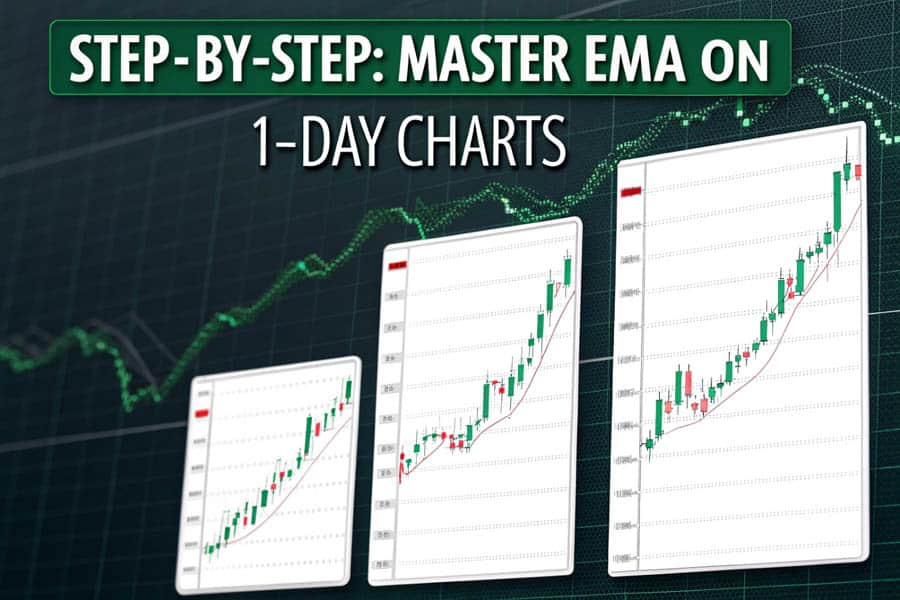
Applying and interpreting EMA signals on a 1-day chart is a straightforward process that can significantly enhance your trading strategy. The key is to understand what the EMA is telling you about price action.
Step-by-step guide to applying EMA on a 1-Day Chart
Most trading platforms offer EMA as a standard indicator, making it easy to implement in your analysis. Here’s a general guide:
- Open your charting platform: Log in to your preferred trading platform, whether it’s provided by your regulated forex broker or a dedicated charting service.
- Select the asset: Choose the specific stock, currency pair, or other asset you wish to analyze.
- Set the timeframe: Ensure your chart is set to the “1-day” timeframe to analyze daily price movements.
- Add the EMA indicator: Navigate to the indicators menu within your platform and select “Exponential Moving Average” or simply “EMA.”
- Configure the settings: Enter the desired period for your EMA (e.g., 9, 20, 50). You can add multiple EMAs with different periods to your chart for a more comprehensive view.
- Analyze the chart: Observe how the price interacts with the EMA(s). Look for crossovers between different EMAs, instances where the price breaks above or below the EMA, and the overall slope of the EMA to gauge trend strength.
Combining EMA with other indicators (e.g., RSI, MACD) for better accuracy
While the EMA is a powerful tool on its own, combining it with other technical indicators can significantly improve the accuracy of your trading signals and provide a more holistic view of market conditions.
- EMA and RSI (Relative Strength Index): Using the RSI to confirm overbought or oversold conditions when the price interacts with an EMA can help filter out potential false signals. For example, if the price breaks above the 20-day EMA and the RSI is not in overbought territory, it adds confluence to the bullish signal, suggesting a higher probability of the upward movement continuing.
- EMA and MACD (Moving Average Convergence Divergence): The MACD, which itself utilizes moving averages, can effectively complement EMA analysis. Look for MACD crossovers that align with EMA crossovers for stronger confirmation of potential trend changes. This convergence of signals from different indicators increases the reliability of the trading setup.
- EMA and Volume: Analyzing trading volume in conjunction with EMA signals can provide valuable insights into the strength and conviction behind price movements. A breakout above an EMA accompanied by high volume suggests stronger buying pressure and greater conviction behind the move, increasing the likelihood of the breakout being sustained.
Real-world examples of EMA signals on 1-Day Charts
Consider a scenario where a stock price is trending upwards, consistently remaining above its 50-day EMA. This suggests a healthy medium-term uptrend is in place. If the price subsequently dips and touches the 50-day EMA before bouncing back upwards, this could present a potential buying opportunity for swing traders, as the EMA is acting as dynamic support.
Conversely, imagine a currency pair in a downtrend, consistently trading below its 20-day EMA. If the price rallies and reaches the 20-day EMA, then reverses downwards, this could be a potential selling opportunity, with the EMA acting as dynamic resistance. Observing these interactions and crossovers on actual price charts will solidify your understanding of how to effectively interpret EMA signals in real-world trading scenarios.
Backtesting EMA Settings

Before implementing any EMA-based trading strategy with real capital, backtesting is an absolutely essential step. It allows you to evaluate the historical performance of your chosen settings and refine your approach.
Importance of backtesting EMA settings for 1-day charts
Backtesting involves applying your chosen EMA settings to historical price data to simulate how they would have performed in the past. This crucial process allows you to assess the effectiveness of different settings and identify potential strengths and weaknesses of your strategy without risking real money. It helps you understand the historical win rate, average profit per trade, drawdown, and overall profitability of your chosen EMA settings, providing valuable data-driven insights.
Tools and platforms for backtesting (e.g., TradingView, MetaTrader)
Several trading platforms offer robust backtesting capabilities, making it easier for traders to evaluate their strategies:
- TradingView: Provides a user-friendly interface for backtesting various trading strategies, including those based on EMA crossovers and interactions with price. You can visually analyze the results on the chart and optimize your settings based on historical performance.
- MetaTrader (MT4/MT5): Offers a powerful strategy tester that allows you to backtest custom indicators and expert advisors (EAs) based on your chosen EMA settings. This is particularly useful for traders who prefer to automate their trading strategies or conduct more in-depth quantitative analysis.
How to interpret backtesting results
When interpreting backtesting results, focus on key performance metrics that provide a comprehensive overview of your strategy’s historical performance:
- Win Rate: The percentage of trades that resulted in a profit. A higher win rate is generally desirable, but it should be considered in conjunction with other metrics.
- Profit Factor: The ratio of gross profit to gross loss. A profit factor greater than 1 indicates that the strategy has historically generated more profit than loss.
- Maximum Drawdown: The largest peak-to-trough decline in your simulated account balance during the backtesting period. This metric is crucial for assessing the risk associated with the strategy and understanding potential capital exposure.
- Average Profit per Trade: The average profit generated by each winning trade. This helps assess the potential reward of the strategy.
- Average Loss per Trade: The average loss incurred on each losing trade. This helps assess the potential risk of the strategy.
Remember that past performance is not necessarily indicative of future results, but backtesting provides valuable insights into the potential viability and risk profile of your chosen EMA settings and trading strategy.
Read More: Best MACD settings for 1 day chart
Common Mistakes to Avoid When Using EMA
While the EMA is a valuable tool, certain common pitfalls can hinder its effectiveness if not carefully considered and avoided.
Over-reliance on EMA Without Considering Market Context
It’s crucial to remember that the EMA is just one tool in your trading arsenal, and it should not be used in isolation. Relying solely on EMA signals without considering the broader market context, such as significant news events, economic data releases, and overall market sentiment, can lead to suboptimal trading decisions. Always strive to analyze the fundamental factors that might be influencing price action and integrate this analysis with your technical indicators.
Using Too Many EMAs Simultaneously
While using multiple EMAs can provide valuable insights into different trend lengths and potential confluence, overcrowding your chart with too many lines can lead to confusion and analysis paralysis. Stick to a few key EMA combinations that align with your trading style and avoid unnecessary complexity that can obscure clear signals.
Ignoring Fundamental Analysis While Relying Solely on Technical Indicators
Technical indicators like the EMA are most effective when used in conjunction with fundamental analysis. Understanding the underlying economic and financial factors driving price movements can help you filter out false signals generated by technical indicators alone and make more informed trading decisions. For instance, positive economic news for a particular currency might strengthen a bullish EMA signal, providing greater confidence in the trade setup.
Expert Tips for Optimizing EMA Settings
Take your EMA analysis to the next level with these expert tips designed to help you optimize your settings and improve your trading outcomes.
Adjusting EMA settings based on market volatility
Market volatility can significantly impact the effectiveness of EMA settings. During periods of high volatility, characterized by rapid and unpredictable price swings, shorter-period EMAs might generate an excessive number of false signals, leading to confusion and potential losses. In such conditions, consider using slightly longer EMA periods to filter out the noise and focus on the underlying trend. Conversely, during periods of low volatility, shorter-period EMAs might be more effective at capturing smaller price movements and identifying potential entry points.
Combining multiple timeframes for confirmation
Analyzing EMA signals across multiple timeframes can provide stronger confirmation of potential trading opportunities and increase the probability of successful trades. For example, if you observe a bullish crossover on the 1-day chart, check if the shorter-term charts (e.g., 4-hour or 1-hour) also exhibit bullish momentum and similar EMA alignments. This confluence of signals across different timeframes adds weight to the signal and can improve your confidence in the trade setup.
Using EMA crossovers effectively
EMA crossovers are powerful signals that can indicate potential shifts in trend direction. However, it’s important to interpret them within the context of the overall trend and market structure. A bullish crossover (shorter EMA crossing above a longer EMA) is generally considered more significant and reliable when it occurs above longer-term EMAs (e.g., the 200-day EMA), suggesting a potential shift in the major trend from bearish to bullish. Conversely, a bearish crossover below longer-term EMAs can signal a potential shift to a downtrend.
Pro Tips for Advanced Traders
- Dynamic EMA Periods: Explore the possibility of adjusting EMA periods dynamically based on indicators like the Average True Range (ATR). This allows your EMA settings to adapt automatically to changing market volatility, potentially improving signal accuracy.
- EMA Ribbons: Utilize a series of closely spaced EMAs (e.g., 8, 13, 21) to create an “EMA ribbon.” This visualization can help you quickly assess the strength and momentum of a trend. Widening ribbons typically indicate increasing momentum, while contracting ribbons may suggest weakening momentum or a potential trend reversal.
- Fibonacci and EMA Confluence: Look for areas on the chart where EMA levels coincide with Fibonacci retracement or extension levels. These areas of confluence can represent potential high-probability trading setups, as they indicate areas of strong potential support or resistance.
Opofinance Services
Are you seeking a dependable and regulated forex broker to implement your EMA-based trading strategies? Consider Opofinance, an ASIC-regulated broker officially recognized on the MT5 brokers list. Opofinance provides a seamless and secure trading environment with:
- ASIC Regulation: Ensuring a secure and transparent trading environment, providing peace of mind for traders.
- MT5 Platform: Gain access to the powerful MetaTrader 5 platform, equipped with advanced charting tools and a wide array of technical indicators, including EMA, to support your analysis.
- Social Trading: Connect with and learn from experienced traders through Opofinance’s social trading features, potentially mirroring their successful strategies to enhance your own trading.
- Safe and Convenient Deposits and Withdrawals: Enjoy hassle-free and secure transactions, making managing your trading capital easy and efficient.

Ready to explore the possibilities and elevate your trading experience? Visit opofinance.com today!
Conclusion
Mastering the selection and application of the best EMA settings for a 1-day chart is an ongoing process that involves understanding your trading style, diligently backtesting different approaches, and adapting to the ever-changing dynamics of the market. While there is no single “magic” setting that guarantees success, the insights and strategies discussed in this comprehensive guide provide a solid foundation for making more informed and data-driven trading decisions.
Remember the importance of combining EMA analysis with other technical and fundamental tools, always considering the broader market context to enhance the reliability of your signals. By consistently applying these principles and continuously refining your approach, you can unlock the power of the EMA and significantly improve your trading outcomes on the daily timeframe.
Key Takeaways
- The best EMA settings for a 1-day chart are not universal and depend on your individual trading style, risk tolerance, and the specific characteristics of the assets you trade.
- Commonly used EMA settings for daily charts include combinations like the 9 and 21-day EMA for short-term trends, the 20 and 50-day EMA for intermediate-term analysis, and the 50 and 200-day EMA for identifying long-term trends.
- Shorter EMA periods are more responsive to price changes but are also more susceptible to false signals, while longer periods provide a smoother view of the trend but react more slowly to price movements.
- Combining EMA with other technical indicators such as the RSI and MACD can help to filter out false signals and provide stronger confirmation of potential trading opportunities.
- Thoroughly backtesting your chosen EMA settings on historical data is crucial before deploying them in live trading to assess their potential effectiveness and risk profile.
- Avoid over-reliance on EMA signals alone and always consider the broader market context, including fundamental analysis and market sentiment, to make well-informed trading decisions.
Can I use the same EMA settings for all currency pairs on a 1-day chart?
While certain EMA settings may work reasonably well across various currency pairs, it’s generally advisable to backtest and potentially adjust settings based on the specific volatility and trading characteristics of each individual pair. Some currency pairs tend to trend more consistently, while others exhibit more erratic price action, which may necessitate different EMA sensitivities.
Is it better to use the high, low, or closing price when calculating the EMA on a 1-day chart?
The most common and widely accepted practice is to use the closing price when calculating the EMA. The closing price is generally considered the most significant price point of the day, as it represents the final consensus between buyers and sellers. However, some traders may experiment with using the high, low, or even the median price depending on their specific trading strategy and analytical preferences.
How can I identify if my chosen EMA settings are no longer effective?
If you observe a significant increase in the number of false signals generated by your EMA settings, a noticeable decrease in your trading strategy’s win rate, or a consistent underperformance compared to your backtesting results, it may be an indication that your chosen EMA settings are no longer optimally aligned with current market conditions. Market dynamics evolve over time, and what worked effectively in the past may require adjustments to maintain its effectiveness. Regularly review and adapt your strategies as needed to stay in sync with the market.